You can complete the AWS Wavelength boot process in just three steps. The tutorials available online, including the official guide, are described in too much detail. For individual users who only have streaming viewing needs, this article can help you save many unnecessary steps.
Introduction to AWS Wavelength#
Official Introduction: https://aws.amazon.com/cn/wavelength/
Currently available regions: https://aws.amazon.com/cn/wavelength/locations/
In simple terms, it allows server traffic to go through the operator's gateway. For the scenario where we use it as a proxy, the operator's IP is very clean, and you can enjoy native local internet access.
Three Steps to Boot#
This article takes the example of booting up AWS Wavelength in the KDDI region of Japan. The tutorials available online, including the official guide, have a step to create a new VPC. In fact, you can just use the default VPC, which can save many steps later.
1. Configure the Gateway#
Enter "VPC" in the search box to enter the VPC control panel, go to the operator gateway, and open the Wavelength available zone.

After enabling the KDDI available zone, go to the operator gateway configuration and click "Create Operator Gateway". Since we didn't create a new VPC, you can select the default one here. Check the box "Route subnet traffic to the operator gateway" and create a Wavelength subnet. Copy the IPV4 CIDR block from the VPC, fill in /24, and increase the numbers in the C segment. If there are no errors, it's fine. 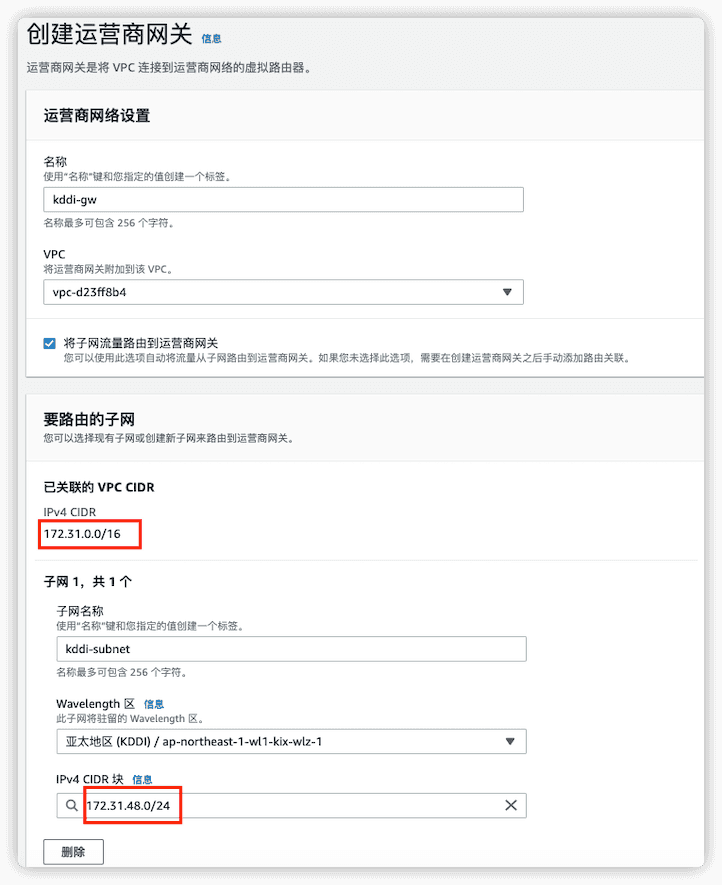
2. Create EC2 Instances#
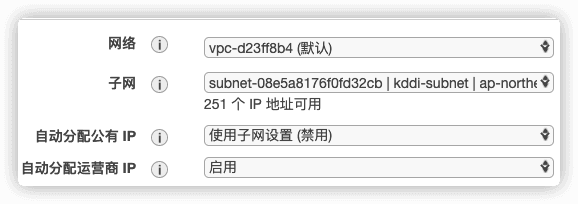
Go back to the EC2 control panel and create a Wavelength EC2 instance. Note that you can only choose from t3.medium, t3.xlarge, r5.2xlarge, g4dn.2xlarge. Here we choose t3.medium. The instance configuration needs to select the kddi subnet created just now, with the following configuration. Other configurations are the same as usual, remember to open all traffic in the security group.
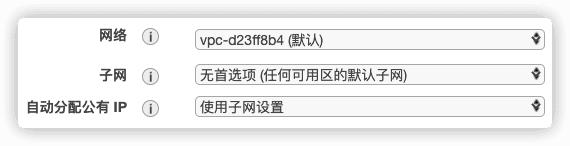
Because Wavelength instances cannot be assigned a public IP, we need to create an additional regular EC2 instance for internal network forwarding. Keep the default configuration for this one. Here we use the free t2.micro.
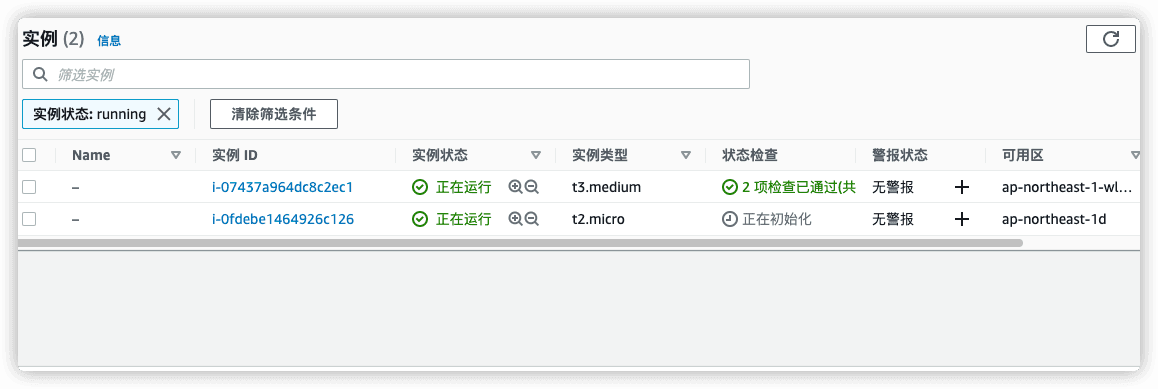
Both instances are created successfully. Record the private IP of the Wavelength instance and the public IP of the regular EC2.
3. Configure Instance Forwarding#
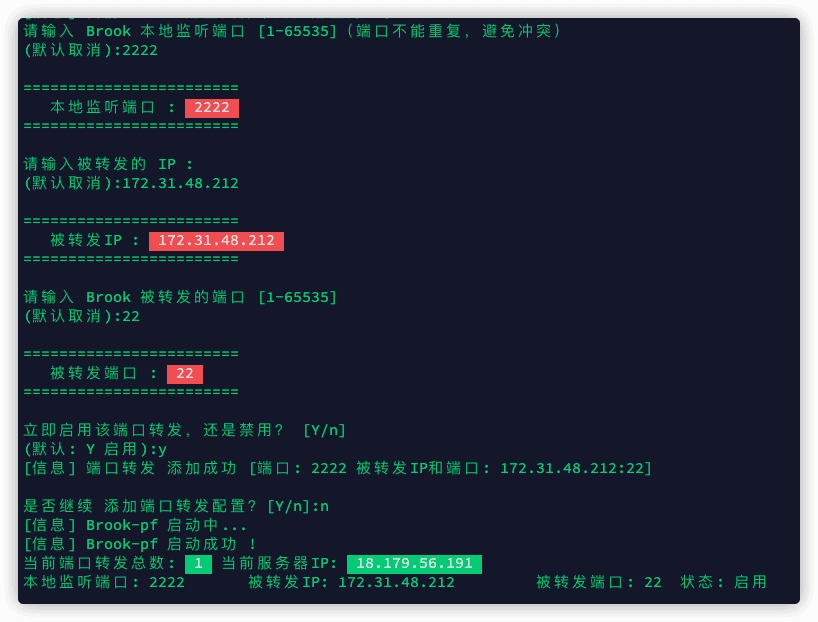
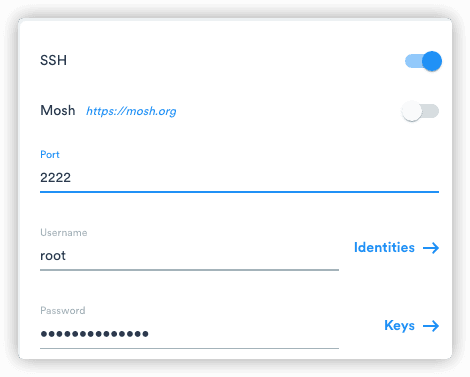
First, connect to the regular EC2 and use iptables or brook to configure forwarding. The target IP is the private IP of the Wavelength instance, and the target port is its SSH port. After the forwarding is completed, just change the SSH port to the listening port of the forwarding, and you can connect to the Wavelength instance.
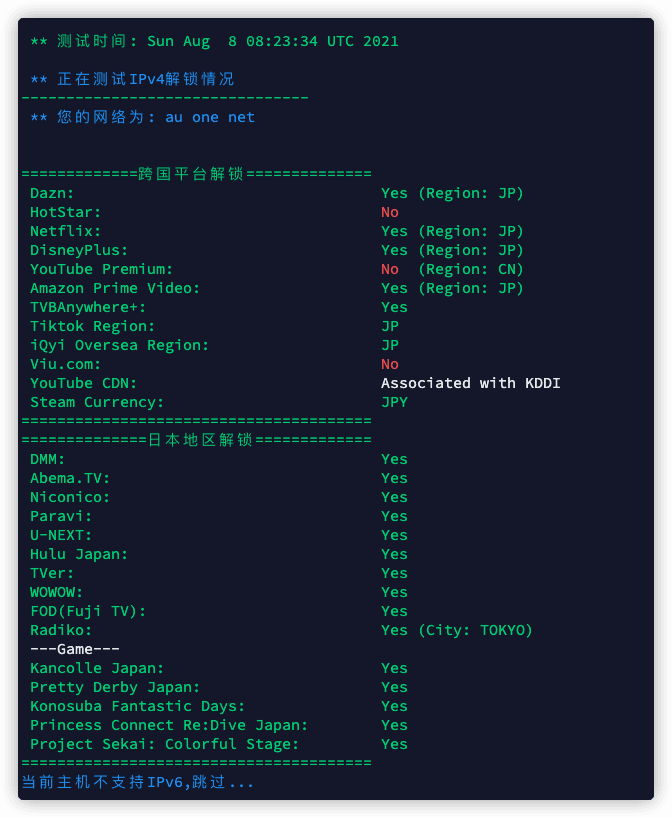
Media streaming test, no problem.
Summary#
The steps for booting up the panel are as described above. Of course, there are even simpler boot methods. Many experts have developed AWS boot bots that use APIs to boot up, which are faster and more efficient. However, they all require purchasing authorization and are suitable for businesses that need to boot up in batches. For individual users who do not have batch boot requirements, you can refer to the boot method described in this article.